Multi-view Dataset Generation
Last semester we focused on the controllability component of our research object where the goal was to control the expressions using Facial Action Encoding System (FACS). While we set the foundation for the multi-view dataset generation, we solidified our approach and shifted our focus to the generalizability component. To briefly summarize, the dataset that MoFaNeRF is trained on is heavily skewed to an Asian population and thus did not generalize to our of distribution data. For this reason we wanted to augment the Bp4D+ dataset which provides a much larger diversity of people. However, one of the pitfalls of this dataset is the lack of multi-view data as the dataset is mostly forward facing videos.
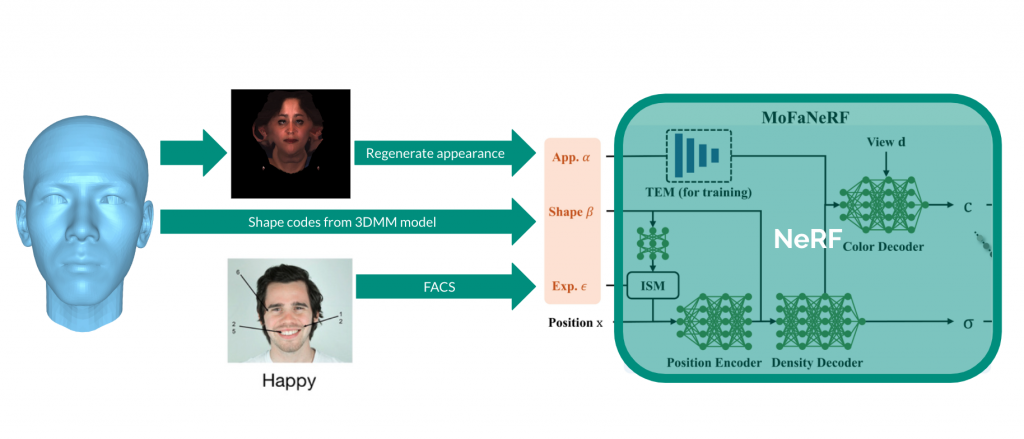
Below in Figure[1] you can see the changes we made to the original MoFaNeRF implementation. As we saw in the previous section, we replaced the expression codes (ε) with FACS. The shape codes are directly taken from the 3DMM head model which is denoted by β. Lastly, the appearance codes (α) are the focus of this section which is the last step for performing the full retraining of the NeRF.
Data Augmentation Pipeline
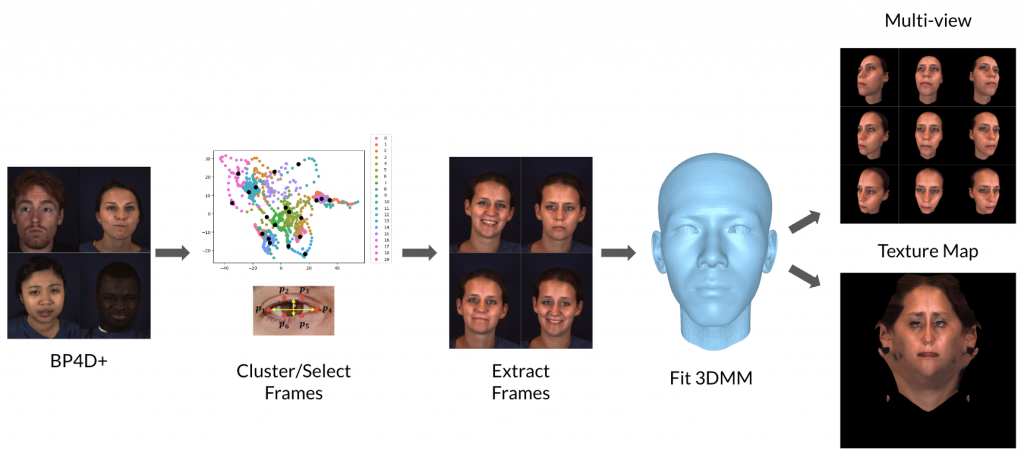
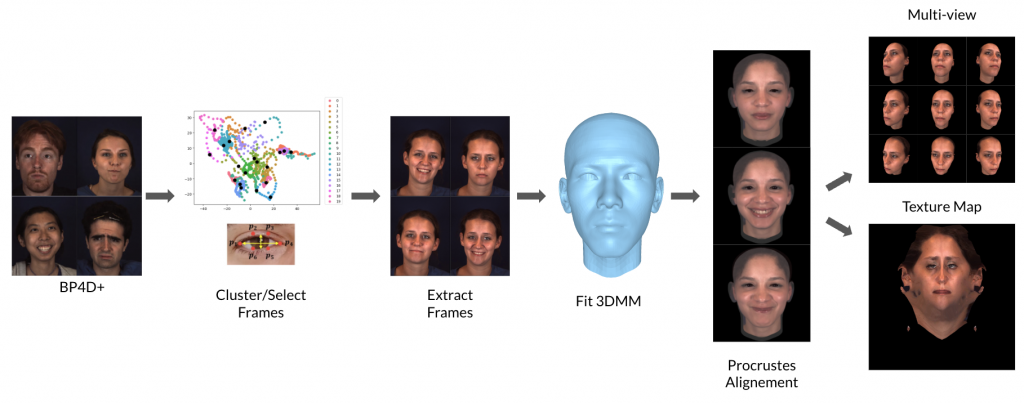
In Figure [2] we have outlined the steps in processing the dataset to render multi-view renders that can be used in training. We will walk through each of the steps where the first step is extracting frames that we can use as expressions and we denote this as “interesting frames”. The next step is to fit the selected frames to the base 3DMM, extract texture and render the multi-view images.
Interesting Frames
Our goal is to augment the original dataset with subjects and expressions that are more diverse to increase the generalizability of our model. Thus in the first step of the data generation pipeline, we would like to pick out a diverse set of “interesting frames” for each subject in the BP4D+ dataset for further processing. Since each subject in the BP4D+ dataset has four videos, there are around 5000 frames for each subject. A lot of these frames of a subject have similar expressions, therefore we decided to choose 20 frames for each subject. We selected the frames with the most diverse facial expressions to maximize the diversity of the dataset, which is what we refer to as the “interesting frames.”
Extraction Process
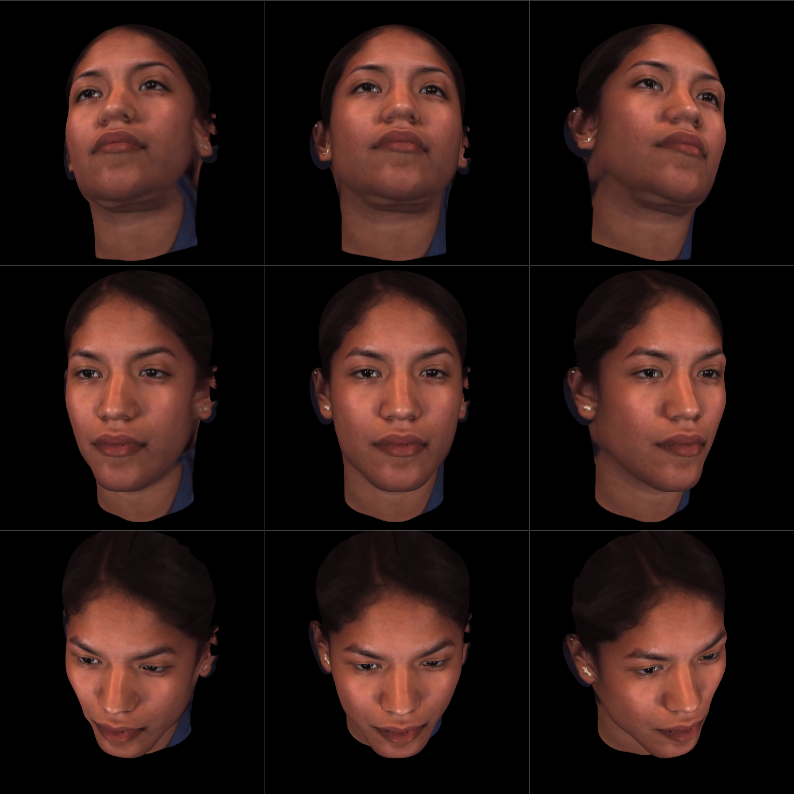
The extraction of the “interesting frames” is done in four steps. First, we combine all of the frames of a single subject into one dataset. As mentioned earlier, there are around 5000 frames for each subject. Then we run our Action Unit (AU) extractor to extract the AUs of every single frame. We run the K-means clustering method with these extracted AUs to cluster the frames into 20 different clusters. In Figure [3], we visualize the frame clusters after applying principle component analysis. Each color represents a cluster, and the cluster centers are represented by black points. Finally, we find the frames corresponding to each cluster center and extract 20 frames. Using these steps, we extracted a diverse set of “interesting frames” for further processing. In Figure [4] we see the extraction result, and the expressions in these frames are very different.

Netrual Frames
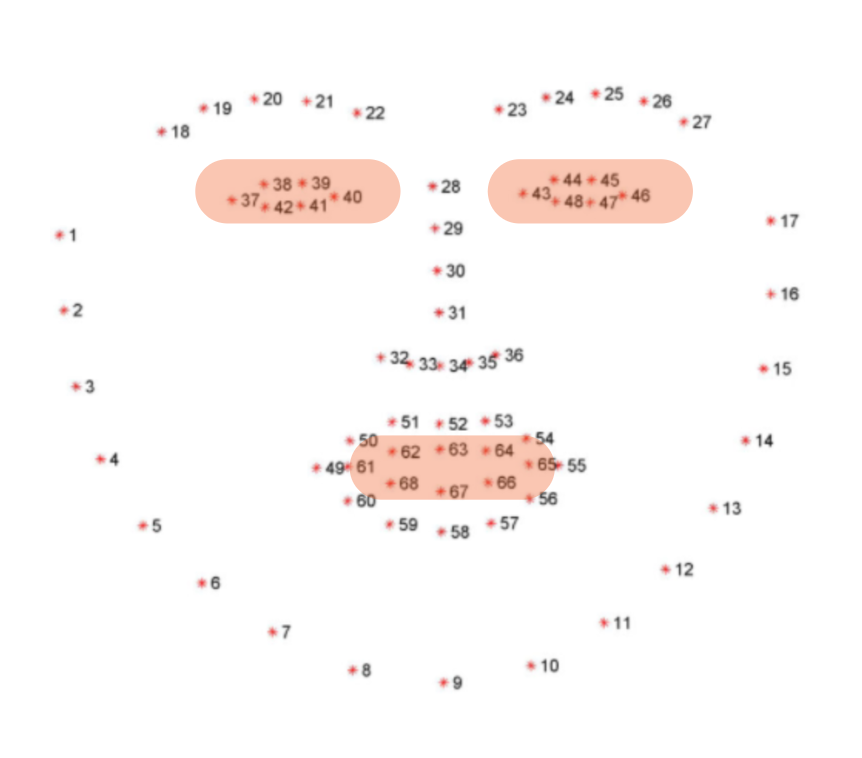
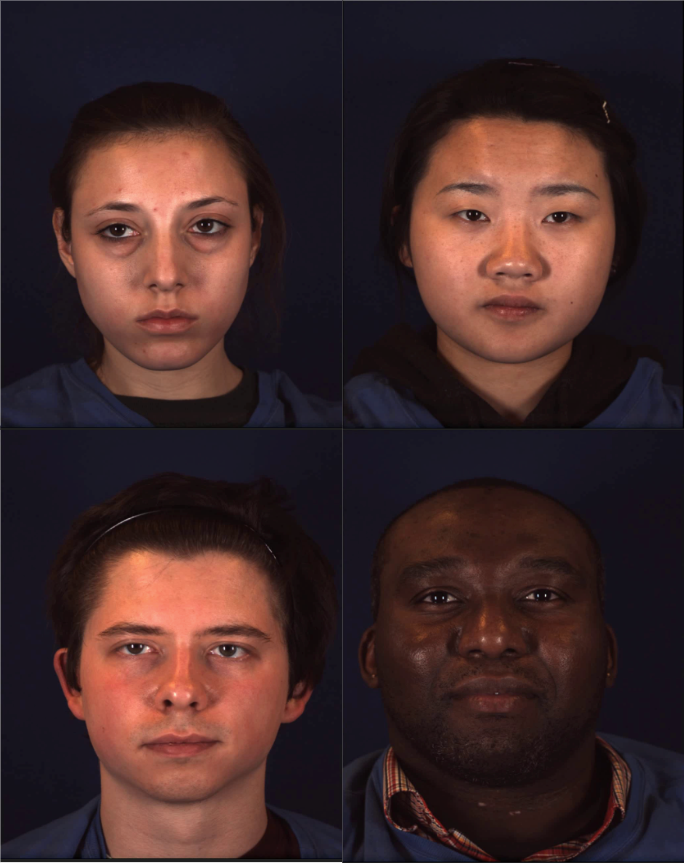
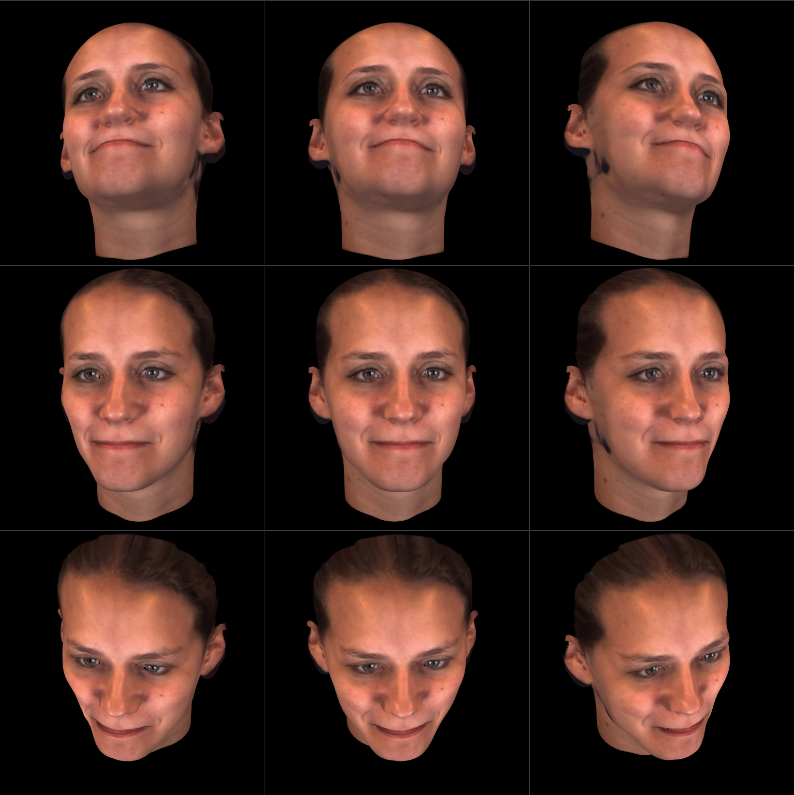
Similar to how we extracted the interesting frames, we want to process the 5000 frames per subject and isolate the best neutral frame. The reason why we want a neutral frame in addition to 20 unique expressions is for extracting the albedo texture map which is used to train the Texture Encoding Module (TEM) in the NeRF implementation. The TEM processes a neutral frame in order to establish a baseline for each of the subjects. In order to extract the neutral frames, we first find which of the frames have the lowest AU, this is usually 0 as this represents the most neutral frame since none of the expressions are activated. While this gave decent results, some of the subjects did not have their eyes fully open or were not facing towards the camera completely.
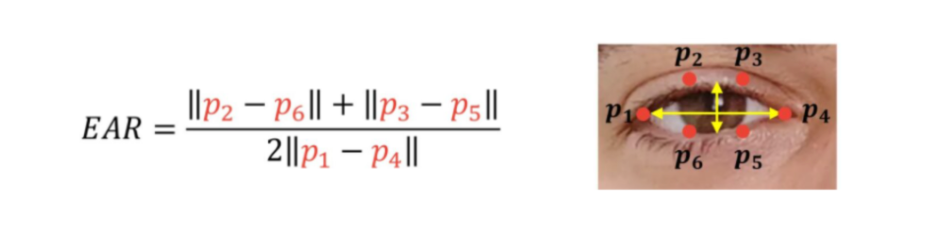
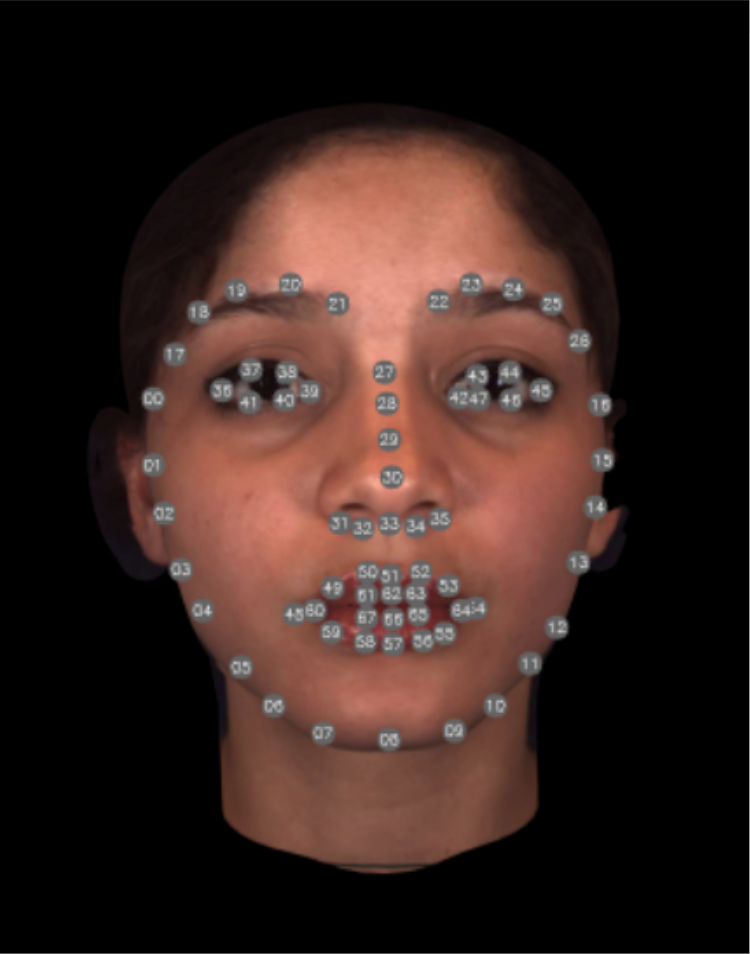
In an effort to get the most forward facing, neutral expression one of the parameters we used to refine the results in the Eye Aspect Ratio (EAR) shown in Figure [6]. The EAR represents how close the eyelids are to being closed based on the size of the eye. This is a tunable parameters and is optimized for different individuals. Using the Dlib keypoints in Figure [5] specifically the highlighted mouth and eye keypoints we can calculated the EAR. While this is originally applied only to the eyes, we extended the same concept to using this metric on the mouth as well to get a resting, close mouth, neutral frame. In Figure [7] we can see examples of the neutral frames that were extracted.
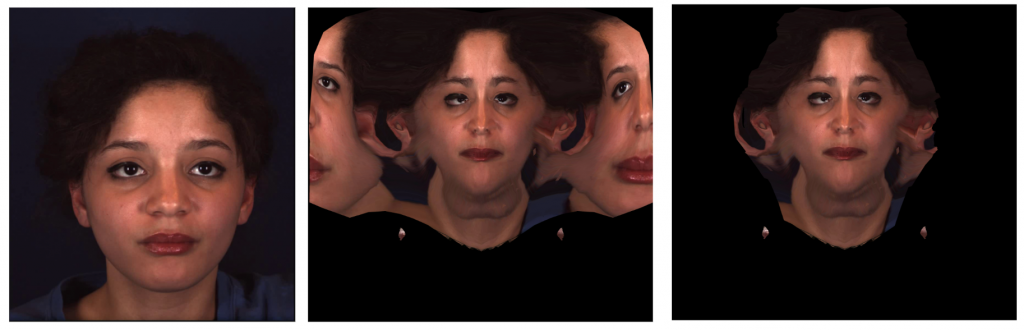
Mesh Edit
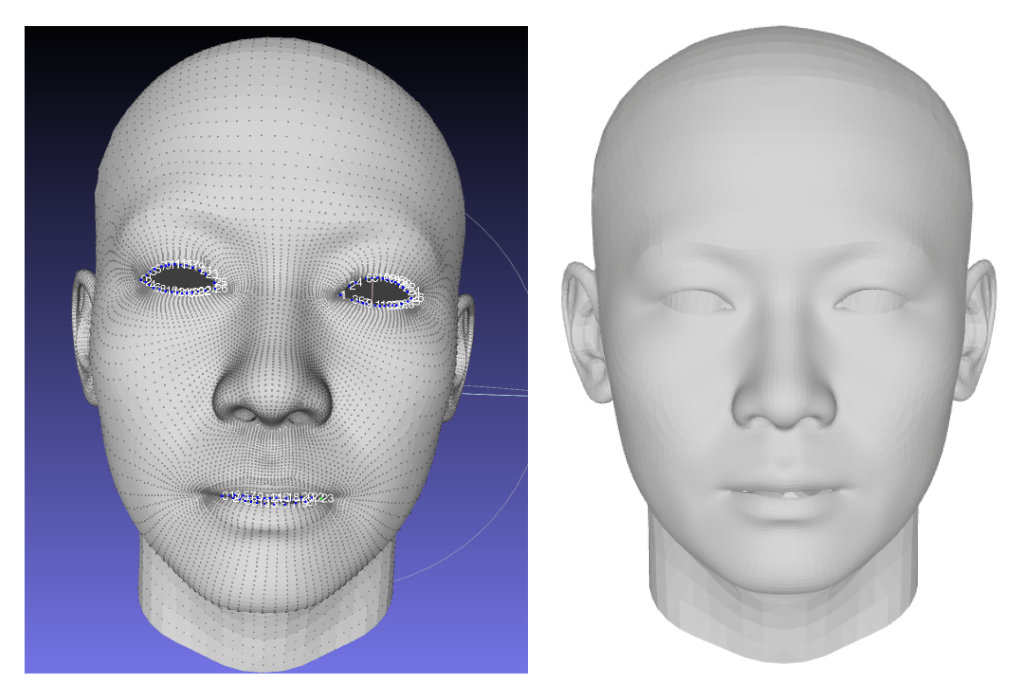
The next part of the pipeline is in order to preserve some of the detail in the eyes and mouth. This is part of our Spring ’22 progress so please refer to that section for more details. Below in Figure[8] is an example of what the mesh looks like before and after filling in the mesh.
Texture Extraction
One of the key parts of rendering a library of multi-view images for each subject is extracting the albedo, texture map for each of the expressions. From the previous section we saw that we have a head mesh that preserves the eye and mouth cavities which is reflected in the texture maps.
There are four main steps for extracting the albedo:
- Extract keypoints using Dlib.
- Use keypoints and base mesh model to fit the new mesh.
- Get texture from the new fitted mesh by finding the correspondences between a face on the mesh and the projected 2D section on the original image.
- Since we do not have information about the back of the head, to remove the duplication we clip the z-depth past the ears.
Figure [9] shows this progression from the original image, the extracted albedo map (after step 3) and the final adjusted map (after step 4).
Multi-View Rendering
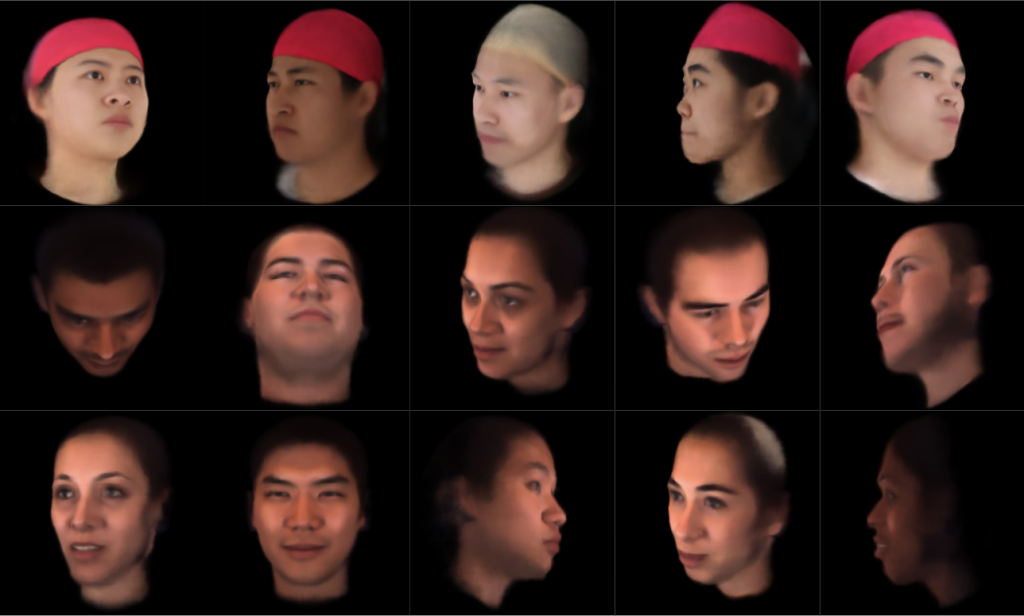
With the completed dataset generation pipeline, we added 200 subjects from the BP4D+ dataset to the original FaceScape dataset, which had around 350 subjects. Each subject had 20 different expressions, and for each expression, there were 120 multi-view images with 6 pitch angles in equal increments between [-30, +45] and 20 yaw angles between [-90, +90]. With this new dataset, we are ready for training!
Preliminary Results
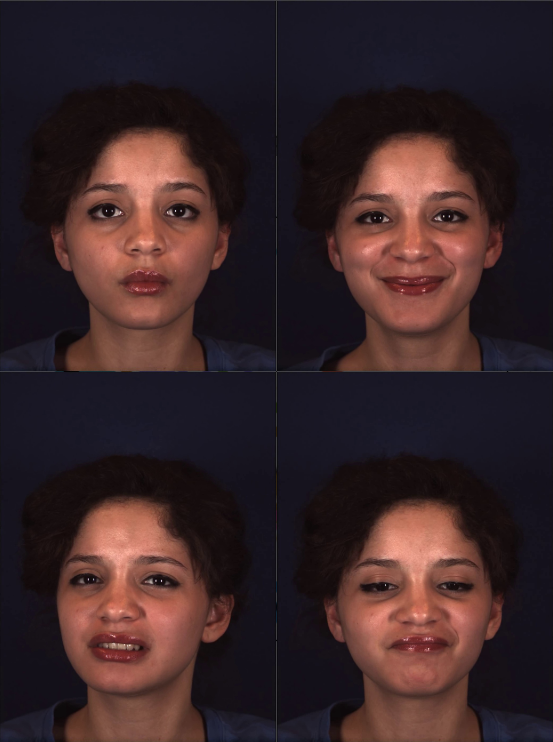
The results are shown in Figure [11]. We can observe that although the MoFaNeRF subjects were doing well, the BP4D+ subjects were blurry. After some investigation, we discovered that alignment played a considerable role in the training quality. If we overlay the images of the same subject with the same viewpoint but different expressions, Figure [12,13], we can see that the result is very blurry. The only variable component is the expression code while the appearance code, shape code, and position inputs are all the same when the model is trained on these images. Due to this reason, it is hard for the model to learn a clear and sharp representation of the subject. To remedy this issue, we decided to use Procrustes analysis to align the subjects.
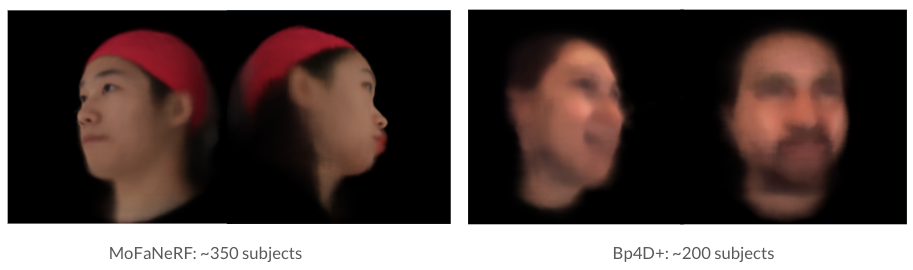


Figure 12: Bp4D+ subject 1 pre-alignment


Figure 13: Bp4D+ subject 2 pre-alignment
Procrustes
Procrustes analysis is a statistical method that compares the geometry of two sets of points, the target points X and reference points Y, and tries to transform X with a matrix R to align X with Y. It does so by finding R that minimizes the sum of squares distance (Frobenius Norm) between the transformed X with Y.
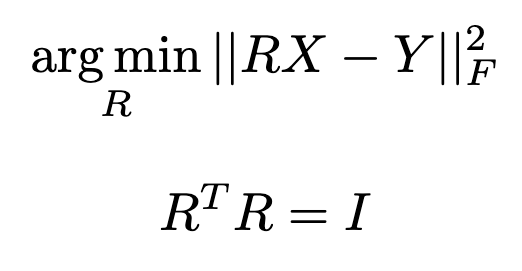
Procrustes Analysis is used to align the subject meshes. However, during the alignment, what do we use as the target points X and the reference points Y? We use the facial landmarks (68 points) of the subjects and a reference face. X will be the facial landmarks of the subject that we want to align, and Y will be the landmarks of a reference face.
In all, there are 3 steps for the whole alignment process:
- Extract the landmarks of the subject and the mean face.
- Run Procrustes Analysis on the landmarks and obtain the transform matrix R.
- Transform all of the points on the subject mesh with the transform matrix R to get an aligned subject mesh.
We run this on all of the BP4D+ subjects and then re-render all the multi-view images. The aligned results are shown in Figure [16,17], which is much cleaner and sharper than the original renderings. We retrain the model with the aligned images. The new dataset generation pipeline with Procrustes Alignment is shown in Figure [18].


Figure 16: Bp4D+ subject 1 post-alignment


Figure 17: Bp4D+ subject 2 post-alignment
Final Results
As shown in Figure [19], the model trained on the aligned dataset is much better than the original model. With the dataset generation pipeline and the Facial Action Coding System (from Spring ’22 progress) we were able to augment the dataset and achieve the two goals we set at the beginning of the project:
- The model is more general and can represent a much more diverse set of people compared to the original MoFaNeRF model.
- Leveraging the controllable Action Units as expression codes, we can control the expressions of the rendered subjects freely!