Motivation
We want accurate depth up-to micron scale. Current sensors operate at 10-25 cm accuracy.
It can be used for precision manufacturing. One example is if you’re 3D printing a biological tissue, you can use precise depth to guide the additive manufacturing process during manufacturing.
It can also be used to detect defects in equipment post manufacturing during deployment.
Interferometry explained
If there are two beams of light with same wavelength used to illuminate a sensor at the same time, they can add or cancel each other out.
We leverage this fact by splitting a beam of light into two halves. During the split the phase difference between the two halves is the same.
Below is what happens to each part.
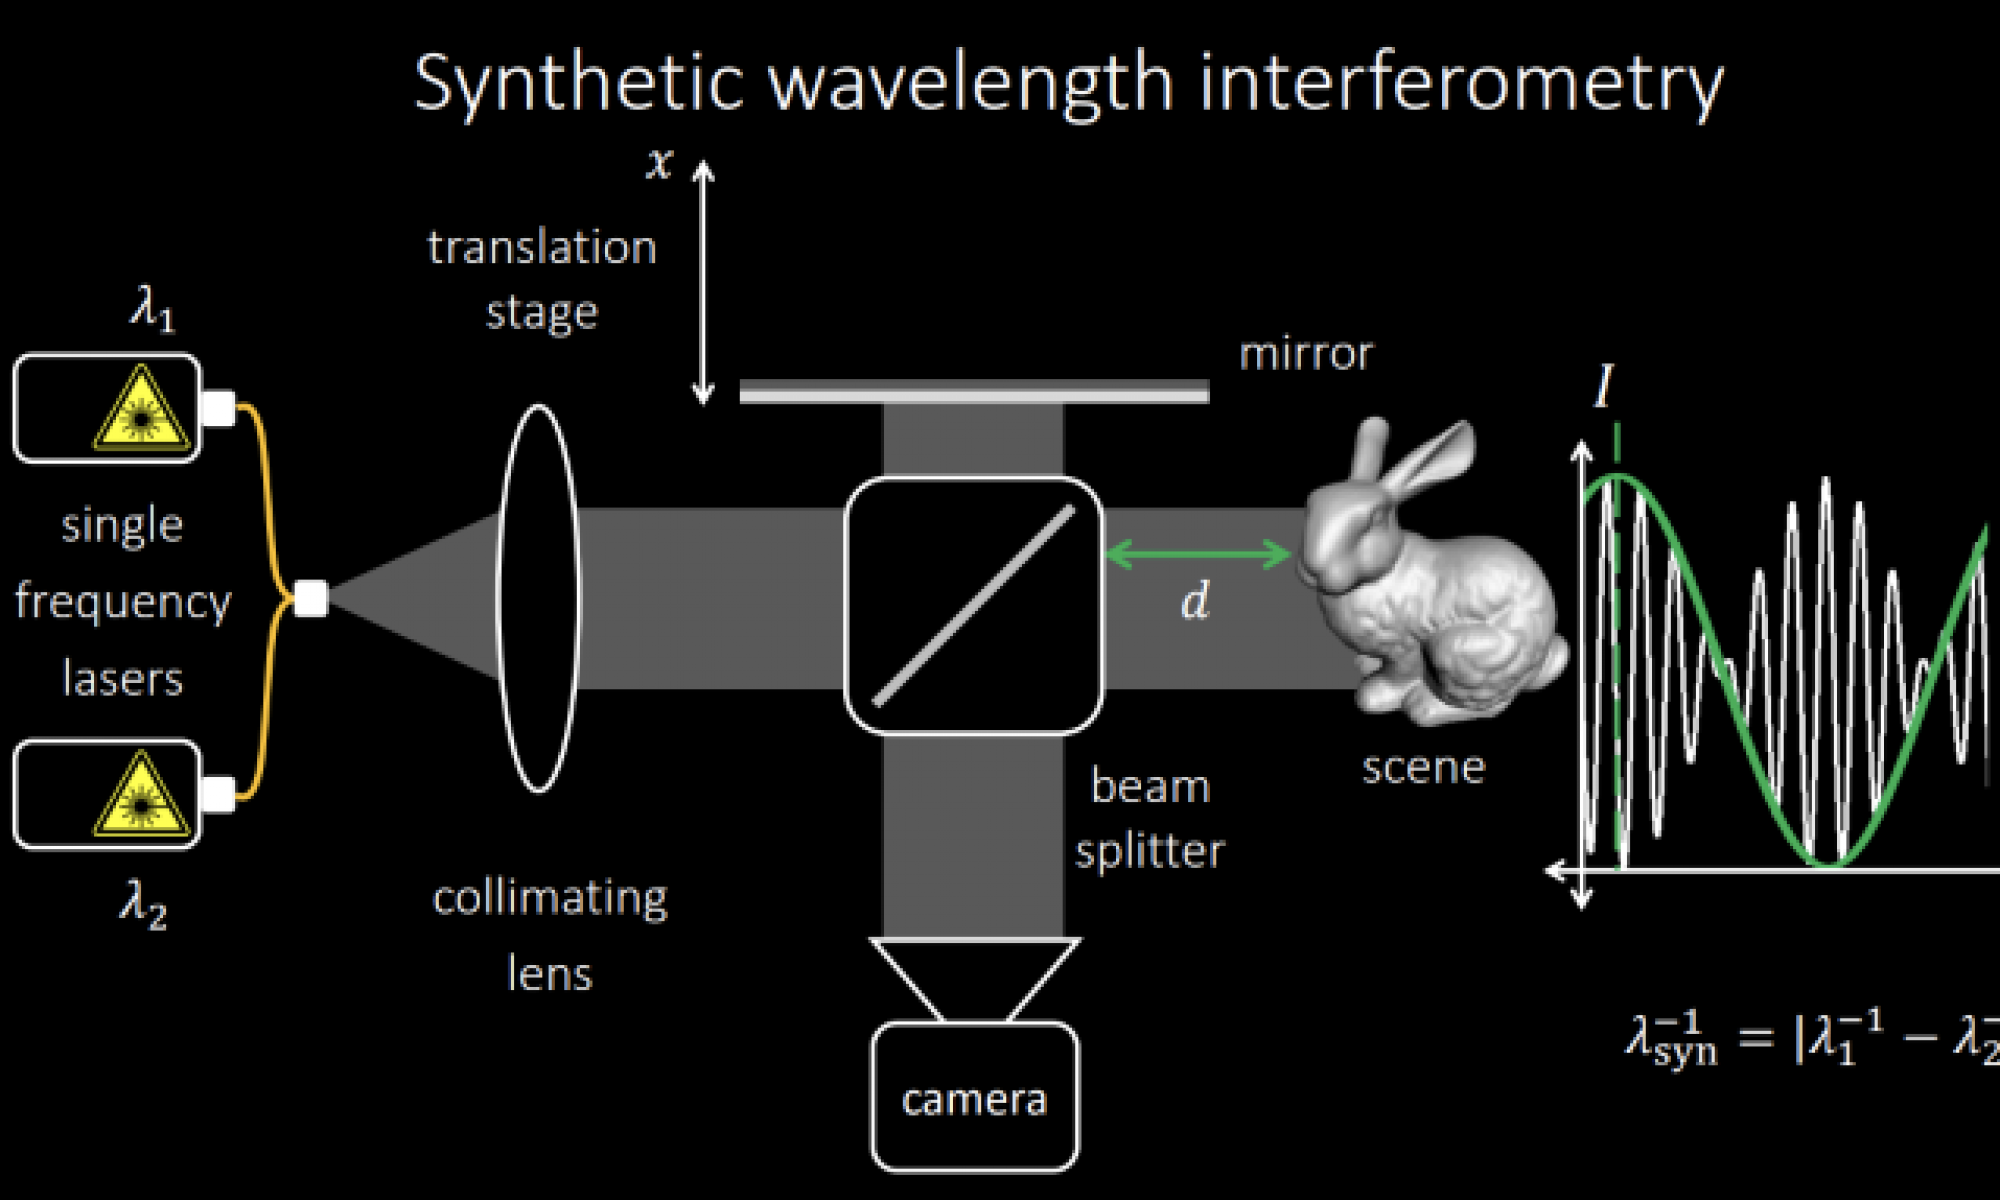
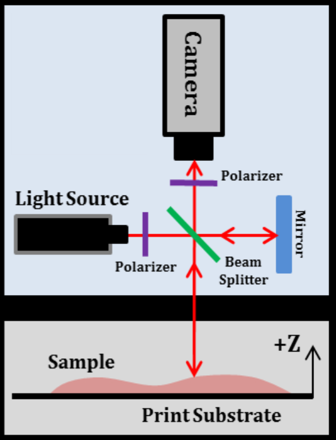
- Part one reflects from a movable-mirror kept perpendicular to the beam and goes into the camera. The distance travelled by this part is controlled by us since we can move the mirror.
- Part two reflects from the scene and goes into the camera. The distance travelled by this part depends on the scene depth.
Figure 1 shows the whole measurement process, the intensity for the pixel corresponding to bunny’s nose is plotted on the right as a function of mirror’s translation

This can only help us if all the scene lies between (0, wavelength) depth values. The wavelength is in 100s of nanometer range.
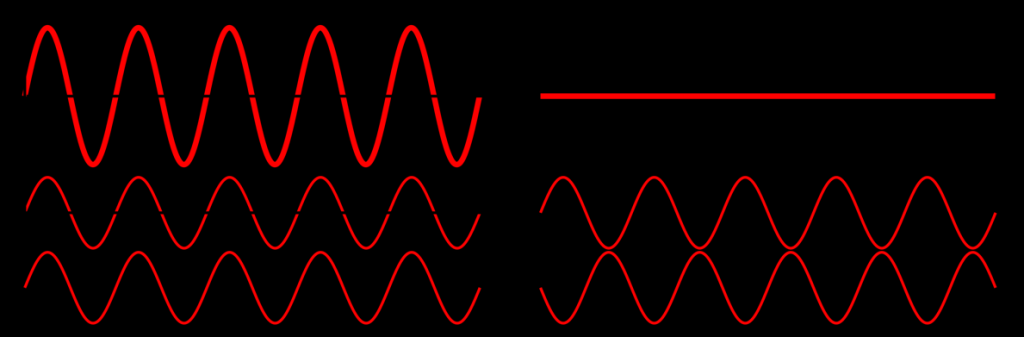
To extend the range, we use two slightly different wavelengths at the same time which result in intensity graphs of both the wavelengths getting added. Intensity graph can be found below in Figure 2

This looks like an amplitude modulated wave which has 2 components a high frequency carrier wave(white) and a low frequency message wave(green).
Carrier removal from AM signals is a well known technique. Once we have removed carrier we just have to extract phase from green signal and scale it appropriately using synthetic wavelength to get depth.
The green curve in Figure 2 has a much higher wavelength and will help us resolve depth up to much larger distances.